June 19, 2011
June 17, 2011
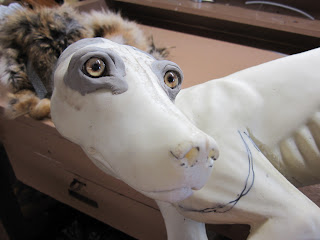
Day 11: Coyote done!
I'm really pleased with how she turned out
When she's dry I can remove the mesh and pins in her ears and lips, dust off any residue clay on the eyes, as well as airbrush some of her features. I can't wait to bring her back home.
Thank you Dan for teaching me so much, and also to Danielle for being my accomplice!
Thank you Dan for teaching me so much, and also to Danielle for being my accomplice!
June 16, 2011
Day 10: Coyote in progress
Time to put Winnie's clothes on!
(There's a story behind that name)
I kept a damp paper towel on her face so it didn't dry out.
She's undergoing facial reconstructive surgery... the final reveal tomorrow!
June 15, 2011
Day 9: Mannequins
Prep, prep & more prep...
Made tail, sewed holes, shaved form, fit hide etc.
I chose the alert turning coyote pose
Fitting and pinning
She fits!
June 14, 2011
Day 8: Coyote liposuction
Today we spent the whole day removing the fat and turning the ears, eyes and lips
Wet doggie!
We combed the fur out and then threw em back in the tanner.
---------------------------------------------------------------------------------------
Not too many interesting shots for the day so here's a look around the studio:
The building used to be an old tobacco factory and is 64,000 square feet!
Dan's demo station
↑ We have a drawer full of parts like these at work ↓
June 13, 2011
Day 7: Coyote
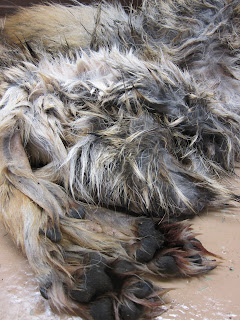
Today we began with the frozen thawing coyote and ended the day by putting the skin
into the auto tanner. There is warm water and three chemicals in the machine:
Aluminum sulphate (which sets the hair), salt (which gets the dirt and contaminants out of the hide), and soda ash (which neutralizes the pH). It's really important to tan the skin as soon as possible before bacteria starts eating away at the hair follicles. Once the fur starts falling out, there's no saving it!
I got a girl coyote :)
What big teeth she has
June 11, 2011
Day 6: Hen done
This was the most stubborn mount so far. Her skin was like tissue and the feathers didn't want to lay.
I'm happy with how she turned out in the end though!
For our third bird we had to choose a more dynamic pose, so here she is - preening.
Got my bird taxidermy certificate!
June 10, 2011
Day 5: Hen...
...or as I like to call her, "girl duck"
I'm really lucky cause Dan gave me one of two hens.
Everyone else had to do another mallard or pheasant.
I started and nearly finished her today.
I got her skinned, fleshed, de-greased, tumbled, patched, boraxed, wired and sewn up!
Only things left to do for now are the head, affixing her to the base and some finishing touches.
I'll airbrush the duck feet and pheasant waddles when they're dry.
I got her skinned, fleshed, de-greased, tumbled, patched, boraxed, wired and sewn up!
Only things left to do for now are the head, affixing her to the base and some finishing touches.
I'll airbrush the duck feet and pheasant waddles when they're dry.
June 9, 2011
Day 4: Mallard mounting
We didn't quite get done with our mallards today. We still need to secure the feet better, position the wings and blow dry the feathers some more. But this is what he looks like now!


June 8, 2011
Subscribe to:
Comments (Atom)


